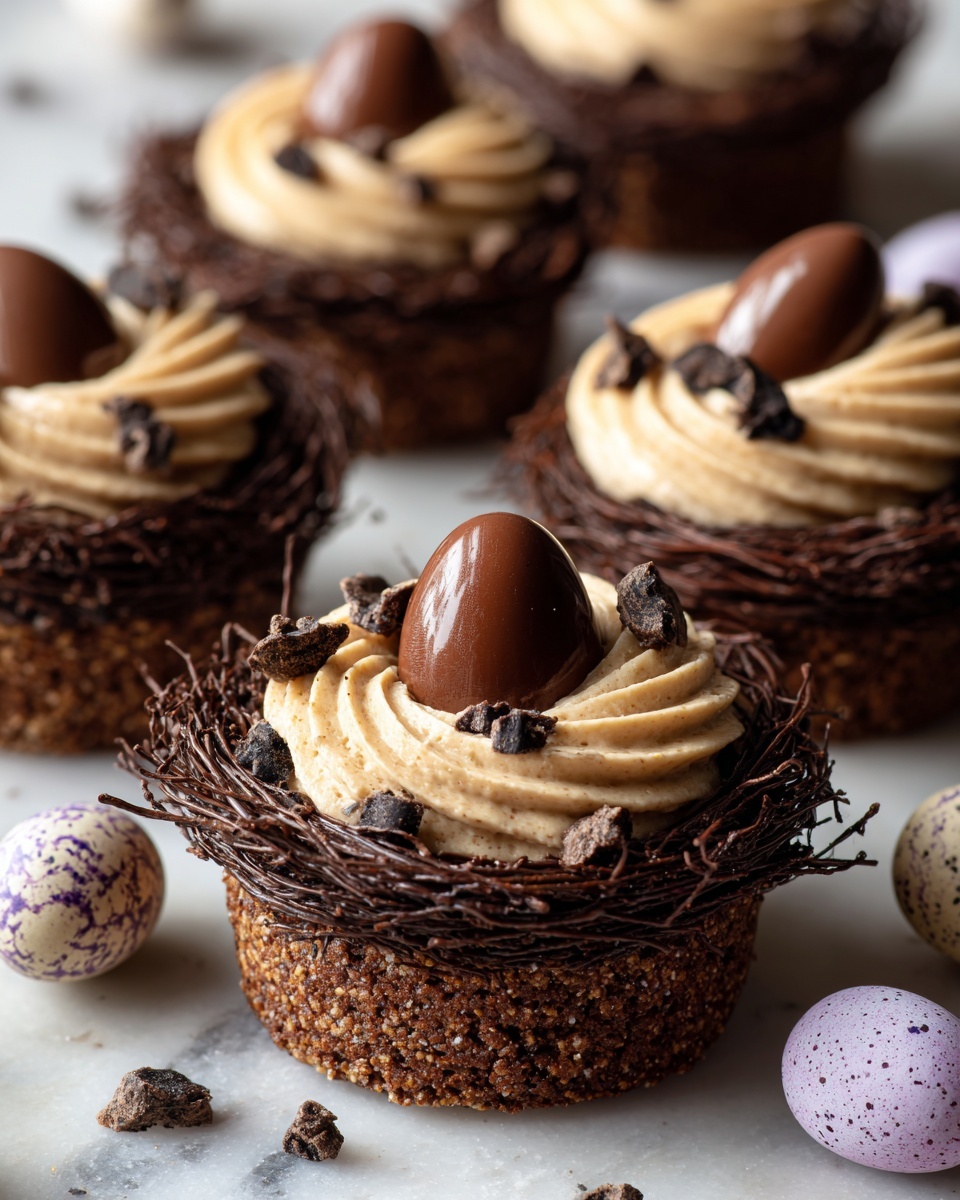
If you’re searching for a charming and delicious springtime treat to brighten up your Easter celebrations, look no further! This Chocolate Meringue Easter Nests Recipe combines light, airy meringue with luscious chocolate and colorful candy eggs to create an irresistible dessert that’s as fun to make as it is to eat. The crisp, delicate texture of the meringue gives way to rich chocolate drizzles, topped with festive candies that bring a delightful crunch and vibrant splash of color. Whether you’re baking for a family gathering or gifting something sweet to friends, these nests will quickly become a treasured tradition.
Ingredients You’ll Need
The beauty of this recipe lies in its simplicity. Each ingredient plays a vital role to ensure your Chocolate Meringue Easter Nests come out perfectly crisp, sweet, and festive. With just a handful of essentials, you’ll create a stunning dessert centerpiece.
- Egg whites: Whipped to fluffy perfection, they are the base that creates the delicate meringue texture.
- Granulated sugar: Gradually added to stabilize the meringue and provide just the right amount of sweetness.
- Cream of tartar: Helps stabilize the egg whites and achieves those glossy, stiff peaks.
- Salt: A pinch enhances the flavors and balances sweetness.
- Vanilla extract: Adds subtle warmth and depth to the sweet meringue.
- Chocolate chips: Melted to create a rich chocolate drizzle that contrasts beautifully with the airy nests.
- Butter: Adds smoothness and shine to the melted chocolate.
- Candy eggs or jelly beans: The crowning glory that turns each nest into a festive Easter delight.
How to Make Chocolate Meringue Easter Nests Recipe
Step 1: Preheat and Prepare
Start by setting your oven to a low 250°F (120°C). This gentle heat is the key to drying out your meringues slowly without browning. Line a baking sheet with parchment paper or a silicone baking mat to ensure your nests won’t stick as they bake.
Step 2: Whip the Meringue
In a large clean bowl, beat your egg whites with a pinch of salt and cream of tartar on medium speed. Watch carefully as soft peaks form, then gradually add sugar a tablespoon at a time. This slow incorporation ensures a glossy, stable meringue that holds stiff peaks when you lift the whisk. Lastly, fold in vanilla extract for that subtle aromatic lift.
Step 3: Shape Your Nests
Using either a spoon or a piping bag, create small mounds of meringue on your baking sheet. Make sure to form a little well in the center of each mound to mimic a bird’s nest perfectly — this is where the magic of your colorful candy eggs will come to life!
Step 4: Bake Low and Slow
Bake the nests for 1 to 1 1/2 hours until they feel firm to the touch and can be lifted effortlessly off the paper. Then turn off the oven and let them cool inside for an hour—this prevents cracking and keeps their delicate texture intact.
Step 5: Melt and Drizzle Chocolate
While your meringues cool, gently melt chocolate chips with butter in the microwave using short bursts and stirring between intervals. Once smooth, your chocolate drizzle will be a silky contrast to the crispy nests.
Step 6: Assemble the Nests
Drizzle the melted chocolate over the cooled meringue nests in delicate, artful strokes. Quickly fill the little centers with bright candy eggs or jelly beans to complete that playful, festive look.
Step 7: Let It Set
Allow the chocolate a few minutes to harden slightly to ensure the drizzle stays neat and the nests hold their shape before serving.
How to Serve Chocolate Meringue Easter Nests Recipe

Garnishes
To elevate your nests, consider sprinkling a little edible glitter or finely chopped pistachios around the candy eggs. Fresh mint leaves or tiny sugar flowers can add a delicate botanical touch that feels perfect for spring gatherings.
Side Dishes
This dessert pairs wonderfully with a light fruit salad or a refreshing lemon sorbet. Its airy texture balances richer, creamier side desserts, making for a balanced and memorable Easter spread.
Creative Ways to Present
Serve these nests nestled in individual pastel-colored cupcake liners or arrange them on a tiered cake stand for a charming centerpiece. For a more whimsical touch, place each nest atop a small paper doily or in edible chocolate cups to wow your guests even more.
Make Ahead and Storage
Storing Leftovers
Keep any leftover nests in an airtight container at room temperature for up to 3 days. This preserves their crisp texture and prevents moisture from softening the meringue.
Freezing
You can freeze these meringue nests for up to a month. Place them on a baking sheet to freeze individually before transferring to a sealed container to avoid breaking. Let them thaw at room temperature without opening the container to keep them crisp.
Reheating
Since these nests are best enjoyed crisp, avoid reheating. However, if they soften slightly, pop them into a low oven (about 225°F or 110°C) for 10 minutes to refresh their texture before serving.
FAQs
Can I make the nests dairy-free?
Absolutely! The meringue itself is dairy-free. Just swap the butter in the chocolate drizzle for a dairy-free margarine or coconut oil to keep it vegan-friendly and delicious.
What if I don’t have cream of tartar?
You can substitute cream of tartar with an equal amount of lemon juice or white vinegar. Both help stabilize the egg whites and achieve those perfect stiff peaks.
Are there alternatives to candy eggs?
Sure! You can fill the nests with mini marshmallows, chopped nuts, or even fresh berries for a naturally colorful option that complements the chocolate beautifully.
How do I prevent the meringue nests from cracking?
Cooling them slowly in the turned-off oven helps avoid cracks caused by sudden temperature changes. Also, please be patient; rushing the cooling process often leads to brittle, cracked nests.
Can I use dark or white chocolate instead of milk chocolate?
Yes! Dark chocolate offers a rich, slightly bitter contrast, while white chocolate makes for a sweeter, creamier drizzle. Either choice will pair deliciously with the crispy meringue.
Final Thoughts
I can’t recommend this Chocolate Meringue Easter Nests Recipe enough for adding whimsy, flavor, and festive spirit to your holiday table. It’s a joyous way to celebrate Easter with family and friends while treating everyone to something truly special. Give it a try — your kitchen will smell amazing, and your guests will be asking for the recipe before dessert is finished!
Print
Chocolate Meringue Easter Nests Recipe
- Prep Time: 20 minutes
- Cook Time: 1 hour 30 minutes
- Total Time: 1 hour 50 minutes
- Yield: 12 servings
- Category: Dessert
- Method: Baking
- Cuisine: American
- Diet: Vegetarian
Description
These Chocolate Meringue Easter Nests are a light and crispy treat perfect for Easter celebrations. Crisp meringue nests are baked low and slow, then drizzled with rich melted chocolate and filled with colorful candy eggs to create a festive and delightful dessert that’s sure to please both kids and adults. They offer a satisfying crunch combined with sweet chocolate and candy centers, making them an ideal holiday dessert or party favor.
Ingredients
Meringue Nests
- 4 large egg whites
- Pinch of salt
- 1/4 teaspoon cream of tartar
- 1 cup granulated sugar
- 1/2 teaspoon vanilla extract
Chocolate Drizzle and Filling
- 1/2 cup chocolate chips
- 1 tablespoon unsalted butter
- Candy eggs (mini chocolate eggs or jelly beans), quantity as desired for filling
Instructions
- Preheat the Oven: Preheat your oven to 250°F (120°C) and line a baking sheet with parchment paper or a silicone mat to ensure the meringues don’t stick.
- Prepare the Meringue: In a large, clean bowl, beat the egg whites with a pinch of salt and cream of tartar on medium speed until soft peaks form. Gradually add the granulated sugar one tablespoon at a time while continuing to beat until the meringue is thick, glossy, and holds stiff peaks. Then, add the vanilla extract and beat briefly to combine.
- Shape the Nests: Using a spoon or a piping bag, form small nest-shaped mounds on the prepared baking sheet. Create a shallow well in the center of each mound to resemble a nest where the candy eggs will sit.
- Bake the Meringues: Place the baking sheet in the preheated oven and bake for 1 to 1 1/2 hours, until the meringues are firm to the touch and lift easily from the parchment. After baking, turn off the oven and let the meringues cool inside for one hour to minimize cracking.
- Prepare the Chocolate Drizzle: While the meringues cool, melt the chocolate chips and butter together in a microwave-safe bowl in 20-30 second bursts, stirring in between until smooth and fully melted.
- Assemble the Nests: Once the meringues are completely cool, drizzle the melted chocolate over each nest. Then, fill the wells in the centers with your choice of colorful candy eggs, such as mini chocolate eggs or jelly beans.
- Let the Chocolate Set: Allow the chocolate to harden slightly at room temperature before serving.
Notes
- Make sure all bowls and beaters are perfectly clean and free of grease to achieve stiff meringue peaks.
- Do not open the oven door during baking to prevent meringue from cracking or collapsing.
- You can store unfilled meringue nests in an airtight container at room temperature for up to 3 days.
- The chocolate drizzle and candy fillings can be customized to your preference.
- Use room temperature egg whites for better volume and stability in the meringue.


